Creating branded merchandise is achievable for small businesses without a big budget, a large team or prior experience. If you want to know how to make merch for your brand, establish a strategy before you begin the design process. Before you create a branded T-shirt or order a box of tote bags, you need to understand why you’re making merch, who it’s for and how it fits into your broader brand strategy.
In this guide, we’ll walk you through a clear, practical step-by-step merch production process, from defining your goals to choosing products, setting up production and distributing your merchandise. Whether you want to create branded merch for an event, a giveaway or to sell online, you’ll learn the steps involved and how to make smart decisions along the way.
- With clear goals and the right choices, anyone can create effective merch, even without experience.
- Understanding the merch production process, from selecting products to distribution, leads to better results and helps avoid any unnecessary costs.
- A successful branded merch strategy aligns products with your audience, brand identity and usage.
- To create branded merch, define your goals and audience, choose your products, design for print, plan fulfillment and track results.
- Effective merch strategies include starting small, testing ideas, learning from each merch drop and refining your approach over time.

Step 1: Define your merch goals and target audience
Before choosing your products or designs, define what success looks like for your merch. This step sets the foundation for every decision that follows and helps ensure that your merch supports your business goals.
Set a clear goal for your merch
Common merch goals include increasing brand awareness, supporting event success, strengthening team cohesion/employee satisfaction, generating leads, building customer loyalty and generating revenue. You can also use merch to turn customers into brand advocates, as they will promote your brand wherever your merch goes. Your goal will directly influence what you create, how much you spend and how many units you order.
Identify who the merch is for
Decide whether your merch is intended for customers, employees, prospective clients or event attendees. Understanding your audience, their lifestyle, needs and preferences, and how they will use your merch is more effective than following design trends. A product that your target audience already uses and that fits naturally into their day-to-day life is more likely to deliver long-term value, turn them into loyal customers and support brand advocacy.
If you’re creating merch for the first time, focus on one target audience and one product to keep design decisions simple and costs manageable.

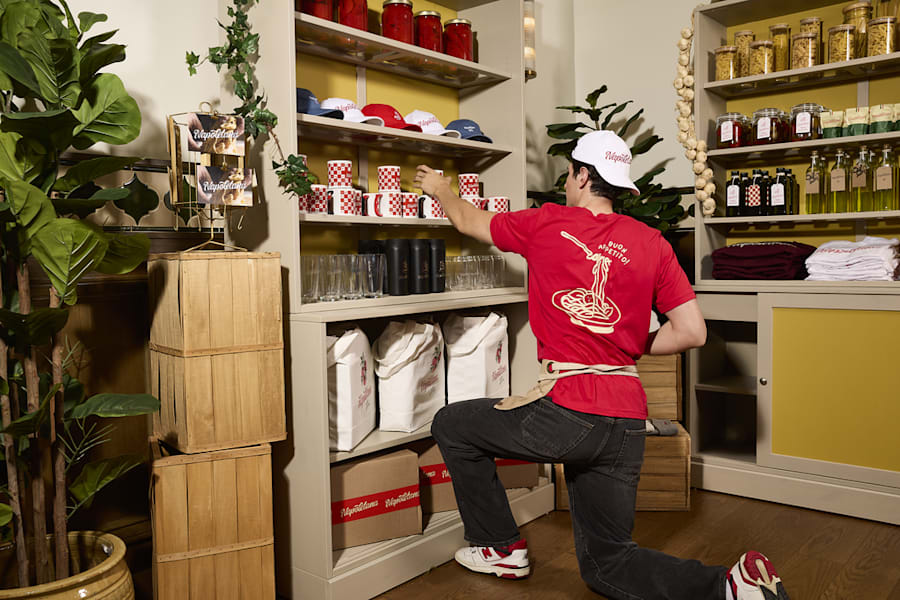
Step 2: Choose merchandise that fits your brand
Once you’ve established your goals and audience, you can start selecting products that align with them and your brand.
Choose your products and materials
Start by reviewing the range of branded merchandise available and narrow down options based on your goals and audience. If this is your first merch drop, start with simple, functional items like pens, mugs, notebooks, clothing and bags. These products are easily customizable and widely used, increasing your brand’s visibility in everyday settings.

Choose items that are aligned with what your business does, providing immediate value to your audience. For example, a fitness studio or gym could use branded water bottles that members use daily for hydration, while a café might choose branded travel mugs customers fill with coffee and carry with them wherever they go.
Still figuring out what swag is and how it’s used by businesses? Browse company swag ideas before deciding which promotional products to order.
Start with products people actually use
Practical items tend to outperform novelty ones because they integrate easily into people’s daily routines. For example, a service-based business might offer branded notebooks, an e-commerce business might give away stickers or sell T-shirts online, while a retail or hospitality business might sell tote bags or drinkware in-store.

The key is choosing products that make sense for your band and audience, such as reusable travel cups for a co-working space. Creativity matters but it should support usability, rather than replace it.
Align merch to your brand identity
Your merchandise should reflect your brand’s tone of voice, color palette, typography, logo usage and values. Consistency helps reinforce recognition and trust.
Consider merch trends and best practices
Current best practices for branded merch include:
- Using eco-friendly materials, such as recycled tote bags, bamboo pens or reusable drinkware, to signal sustainable brand values and appeal to environmentally conscious customers.
- Personalized or customizable items, such as mugs with individual names, event-specific apparel or products featuring specific locations.
- Limited-edition runs tied to specific campaigns. For example merchandise created for a seasonal promotion, product launch, company milestone or event.
- Adding QR codes or scannable elements to create a bridge between physical merch and digital touchpoints, such as your website, social media profiles or an online experience.
Explore promotional product trends, but make sure they align with your audience and brand values.
Step 3: Decide how your merch will be made
How your merch is produced will affect quality and costs, so make sure you understand your options early on.
Choose your printing techniques
Different products and designs call for different printing methods. Embroidery is durable and premium, screen printing works well for bold designs in larger quantities and sublimation is ideal for all-over or full-color prints. Heat transfer is useful for small runs with detailed graphics, while DTG (direct-to-garment) prints full-color designs directly onto fabric. The right printing technique depends on the product, design complexity and use.
Common printing techniques and the products they work best for:
- Embroidery: Hats, polo shirts, jackets, hoodies, T-shirts
- Screen printing: T-shirts, sweatshirts, tote bags, event apparel
- DTG (direct-to-garment): T-shirts and apparel with detailed or multicolor designs
- Heat transfer: Small-batch apparel, promotional T-shirts, short-run campaigns
- Sublimation: Drinkware, tote bags, all-over printed apparel, full-coverage designs
If your logo is simple and you want a premium finish, embroidery is a great choice. If your design is detailed or photo-based, DTG or heat transfer may be more suitable.
Understand print-on-demand vs bulk production
Print-on-demand allows you to produce promotional items as they’re ordered, which reduces upfront costs and inventory risk. Bulk production typically lowers the cost per unit but requires larger initial orders. Print-on-demand often makes the most sense for merch launches or testing ideas, while bulk manufacturing is more cost-effective once you have a clearer idea of demand. When comparing production options, remember that unsold or undistributed merch adds cost without delivering value.
Understand costs and minimums
The cost of printing merch varies based on product, materials, printing method, set-up fees and order size. Ordering higher quantities usually reduces the unit cost, but only if you’re confident that you can distribute or sell the items. Keeping cost expectations realistic helps answer the question of what merch actually costs, and how to make merch orders more affordable.
High-quality, durable materials cost more upfront but tend to last longer and improve brand perception.
Step 4: Create designs that work on real products
Good merch design considers how artwork translates onto physical items, not just how it looks on a screen.
Design and print with the product in mind
Pay attention to the sizing, placement, print area and readability of your design. Designs that are too detailed or small may lose their impact once printed. Always consider how the item will be viewed and used in real life before placing your print order. For example, discover T-shirt design placement when creating T-shirt merch.
Prepare files for production
Merch requires high-resolution files and specific formats to ensure high-quality printing. If you’re designing merch yourself, keep designs simple and follow basic printing guidelines. If you need professional design support, work with a designer or browse VistaPrint’s design services to save you time and reduce errors.
Step 5: Set up production and order
With your merchandise designs now ready, it’s time to set up production and place your print order.
Choose order quantities
Deciding how many units to order depends on how your merch will be used and distributed. For giveaways, events or internal teams, start with smaller quantities to avoid over-ordering. If you plan to sell merchandise or include it with customer orders, consider ordering enough to last through a specific campaign or time period.
If you’re using print-on-demand, start with low minimum orders and adjust quantities as demand becomes clearer. With bulk production, ordering higher quantities can reduce the cost per item, but only makes sense if you’re confident the merchandise products will be used or sold.
If this is your first merch drop, choose quantities that allow you to test interest and gather feedback. You can always reorder once you know which products perform best.
Choose a reliable print partner
Look for quality, consistency and fast turnaround times when choosing a printing service. All-in-one design and printing platforms simplify the process for small businesses by handling the customization, production and ordering.
Make sure you have permissions when printing logos, taglines or licensed designs on your branded merch, especially if items will be sold rather than given away.
Review samples and proofs
Always review your digital proofs or physical samples before going into production. This step helps catch any issues with the color, placement or sizing of your design, and is important even for small orders.
Step 6: Plan fulfillment, packaging and logistics
It’s important to have a clear fulfillment plan in place, as how your merch reaches people is just as important as knowing how to make merch online.
Consider packaging and logistics
Packaging is part of the brand experience and can reinforce quality and professionalism, adding value without requiring any complex logistics. Choose packaging that protects your products during shipping while aligning with your brand values, such as using recyclable materials when your brand prioritizes sustainability.
Plan fulfillment and distribution
Decide early how your merch will be distributed, shipped or delivered. Match the fulfillment method to your merch’s goals and usage. Shipping individual print-on-demand items directly to customers works well for online orders, while bulk ordering may be more cost-effective for events giveaways or team distribution.
Factor shipping costs into your merch budget early on so they don’t cut into margins or limit distribution.
Step 7: Launch, distribute and track
Launching and distributing your merch is not the end of the process. It’s an opportunity to learn and improve.
Roll out merch in phases. Start with one distribution method strategy, such as events, before expanding.
Distribute your merch
Distribute merch at events, as giveaways, with online or in-store orders or to internal teams. Will you sell your merch or give it away to customers, event attendees or employees? This will affect production budget and order quantity. You’ll also need to choose between drop-shipping items individually or shipping in bulk.
Treat giveaways and merch sales differently. Giveaways are about reach and visibility, while sales require pricing and product quality considerations.
Launch your merch
Tie your merch launch to a campaign, event or company milestone to give it added value and context. Limited-edition drops can create urgency, while evergreen merch supports an ongoing brand presence.
If selling merch, confirm pricing covers product, printing, shipping and packaging costs before launch.
Track performance and ROI
Track distribution, and measure engagement, repeat use, brand recognition, visibility and sales to understand ROI. Metrics like repeat orders, social mentions and visibility help you assess which products deliver the most value and inform future merch decisions. These insights help you decide when to reorder specific promotional products, expand your product range or pivot your merch approach. You might find that some designs remain popular year-round while others do well around specific events or launches.
Compare performance after each merch drop. Small adjustments over time can deliver better results than major changes at once.
Create branded merch for your business today
Whether you’re creating merch for an event, customer giveaways or for your team, designing and ordering the right products makes all the difference. With VistaPrint you can explore customizable options designed for small businesses and bring your brand to life with merch that’s practical, memorable and easy to produce.
