Whether it’s for a birthday, the holidays or just a special occasion, knowing how to properly wrap a present turns even the simplest gift into something presentable and memorable.
From classic square boxes to tricky round shapes, this guide has you covered for every type of gift. We’ll walk you through the entire process, so by the end, you’ll know how to wrap a present like a pro—no more crumpled paper or last-minute panic wraps!
- Find out the essential tools you need to wrap a present of any kind
- Learn how to wrap a present like a pro by following our step-by-step guide
- Tackle wrapping trickier shapes like round presents and cylinder-shaped gifts
- Elevate your gift presentation by adding a ribbon to your present
1. What will you need to wrap a gift?
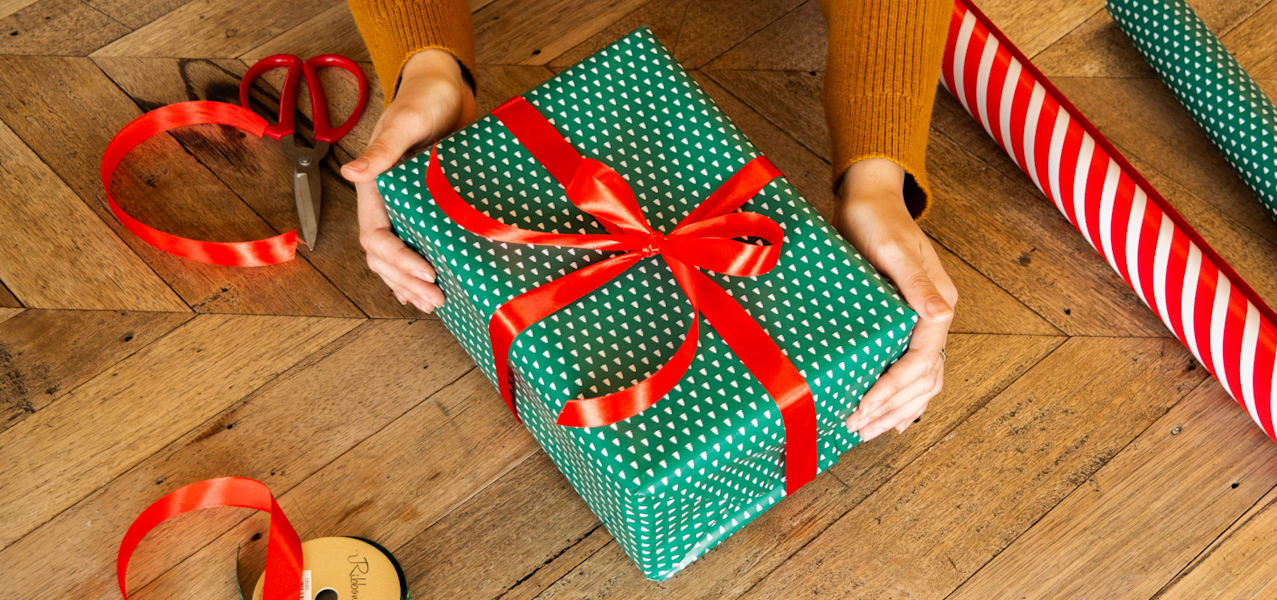
Before you start turning that plain old box into a beautifully wrapped masterpiece, let’s make sure you’ve got the right tools. Think of the following list of equipment and supplies as your ultimate gift-wrapping toolkit—everything you’ll need to get the job done with ease (and without last-minute tape hunts).
Gift wrapping essentials
Let’s face it—there are a few things every household should always have on hand, and no, we’re not talking about snacks or extra batteries. We’re talking about the ultimate gift-wrapping essentials that’ll save you from the dreaded “panic wrap” situation:
- Wrapping paper: This is the foundation of your wrap job. Whether it’s glossy, matte or patterned, you need good quality paper that’s thick enough to hide the gift underneath but flexible enough to fold smoothly. Skip the flimsy stuff that rips at the slightest tug.
- Scissors: Invest in sharp, quality scissors specifically for cutting paper. Dull blades can tear the wrapping paper, leaving you with uneven edges and a frustrating mess. Precision is key for clean, straight cuts that make your gift look polished.
- Tape: Clear adhesive tape is your best friend here. Opt for tape that’s easy to tear off or cut and isn’t too visible on the gift. If you’re feeling a little more ambitious, Double-sided tape can be a game-changer for creating a seamless, professional finish—just keep in mind that you’ll need to fold under all the edges before taping.
- Gift tag or marker: Don’t forget to label your gift! A simple gift tag or marker ensures that the recipient knows who it’s from. It’s a small detail that can easily be overlooked but makes all the difference when it’s time to hand out presents.
Want perfect lines every time? Get wrapping paper with grid lines on the back. It makes cutting straight lines a breeze and spares you the frustration of uneven edges.

Optional extras to kick your gift wrapping up a notch
You don’t need a lot of fancy extras to wrap a gift, but if you’re looking to impress—or make it look like you got professional help—adding a few finishing touches can take your wrapping game to the next level. Whether it’s a pop of color or a touch of texture, these optional extras will give your present that “wow” factor and leave the recipient wondering how you pulled it off so effortlessly:
- Ribbon: A timeless classic for adding elegance. Satin ribbons offer a smooth, shiny finish, while grosgrain provides a more textured, sturdy feel.
- Bow: You can buy a premade bow or go the extra mile and craft your own from ribbon. If you’re wondering how to wrap large gifts, opt for big, fluffy bows to make a statement. For smaller presents, mini bows or handmade fabric bows add a charming, personal touch.
- Tissue paper: Ideal for gift bags or as an extra layer beneath the wrapping paper for delicate items. Choose a color that complements your wrapping theme, or mix and match for a playful vibe.
- Gift box: When you’ve got an awkwardly shaped item, like a plush toy or something irregular, a sturdy gift box can be your best friend.
- Washi tape: Upgrade your standard clear tape with washi tape in fun colors or patterns. It holds your gift together while adding a decorative element that complements or contrasts your wrapping paper.
- Stickers or seals: Stickers or wax seals are great for securing wrapping paper or adding a decorative finishing touch to gift tags and envelopes.
2. How to wrap a present: A step-by-step guide to wrapping gifts
Now that your supplies are ready, it’s time to get down to business.
Wrapping a gift doesn’t have to feel like a battle with the paper or a wrestling match with the tape. Whether you want to learn how to wrap Christmas presents or a birthday gift, this step-by-step guide will make sure your gift looks sharp, neat and totally impressive—no frustrating folds or bulky corners in sight.
3. Step 1: Measure and cut the wrapping paper
Before you start, grab your wrapping paper and unroll enough to comfortably cover the entire gift. Whether it’s a holiday box or an oddly shaped birthday present, this step is key to avoiding awkward gaps and uneven folds.
For boxes or cylinder presents:
- Place your box in the center of the wrapping paper, with the longer sides parallel to the edge of the paper.
- Pull one side of the paper up and over the box. It should reach just past the middle of the top surface.
- Do the same with the other side, ensuring both sides meet with about an inch of overlap. This ensures you have enough to tape down securely without leaving any gaps.
- For the ends, make sure the paper extends about halfway up the sides of the box, enough to fold and create crisp edges.
The process is pretty straightforward when dealing with simple-shaped gifts, right? But how do you wrap a round present?! First and foremost, don’t panic. Yes, it might be a bit trickier, but it’s definitely doable!
For round presents:
- Lay the gift on its side, rolling it towards the center to make sure the paper will cover all the way around.
- Pull one side of the paper up and over the present. It should reach just past the middle of the top surface.
- Pull the other side of the wrapping over the present. Don’t forget that overlap! Leave about an inch of extra paper to cover the edge where the two sides meet.
The next step for cylinder and round shapes is to join the ends.
4. Step 2: Fold edges for cleaner ends
Now that you’ve got the paper measured and cut, it’s time to tidy up those edges. Just fold the sides of the wrapping paper to create a clean edge.
5. Step 3: Join ends
Now, it’s time to secure everything in place! To keep your gift looking clean and polished, flip it upside down so the taped seam is hidden at the bottom.
If you’re wrapping a box, pull the long sides of the paper over the box. Tape it in place at the bottom so that the tape doesn’t show on top.
For cylinder shapes (like candles):
- Wrap the paper around the curved side of the cylinder, making sure the ends of the paper overlap slightly.
- Leave the flat ends of the gift open for now.
- Tape the seam in place along the side of the cylinder for a snug fit.
Once this step is done, learn how to fold the bottom flap of a cylinder gift.
For circular shapes (like basketballs):
- Lay your gift in the center of the wrapping paper and fold the long sides over the object.
- Pull the paper tight and tape it in place, leaving the ends of the gift exposed.
Next, learn how to create and fold flaps to finish wrapping your gift!
If you want an easier way to wrap a circular gift, try gently creasing the paper as you wrap it around the round object. This helps the paper fit the shape more snugly. Once you’ve covered the gift, tie it off with a ribbon for a decorative touch.
6. Step 4: Create flaps on the short sides of the gift
With the longer side all wrapped up, it’s time to handle the shorter ends. This step is key for giving your gift that crisp, clean look. Make sure the gift is centered on the wrapping paper, and you’re ready to create those flaps!
Press the short sides of the wrapping paper in toward the center, forming two triangular flaps on the top and bottom. Crease the edges of the triangles firmly to create sharp, clean lines. You now have flaps!
It’s a bit trickier with round objects, but you can follow the same concept:
- Gather the excess paper on the short side and gently pleat it into triangles, moving toward the center.
- Crease the paper as you go to keep it as tidy as possible, and tape it down.
How to wrap large gifts?
Wrapping large gifts can be a bit of a challenge, especially when the paper doesn’t fully cover the sides. But don’t worry—we’ve got a simple trick to keep everything looking polished.
When creating the flaps on the short sides, you might notice that part of the gift is exposed at the bottom. Here’s how to fix it:
- Finish creating the flaps as you normally would.
- Measure the exposed area to see how much extra paper you’ll need to cover.
- Cut an additional piece of wrapping paper slightly larger than the exposed area.
- Slide this piece underneath the flaps you’ve just folded, ensuring it covers the exposed bottom completely.
- Tape it securely to ensure everything stays neat.
This quick fix makes even the largest gifts look flawless and fully wrapped!
7. Step 5: Fold the flaps
Once the flaps are ready, trim away any excess paper to avoid bulky, uneven folds. Take the bottom flap you’ve created and fold it toward the center of the gift, making sure it lines up neatly. Smooth out any creases and press down the edges for a clean finish. Once it’s in position, secure it with tape.
Now you can fold the other flap over top of the bottom flap. Once again, trim excess paper, smooth creases and press down the edges. Secure the flap with tape.
For cylindrical shapes, fold over one side of the paper, pressing it flat. Then, work your way around, folding the paper at an angle to create a smooth, clean look. Repeat the same process on the other side. Once both ends are neatly folded, tape everything securely in place.
8. Step 6: Add finishing touches
Now that your gift is wrapped and looking sharp, it’s time for the fun part—adding those extra details that make your present stand out. Whether it’s a classic bow, a thoughtful note or even some playful holographic stickers (why not?), these little touches take your wrapping to the next level.
If you want to know how to wrap a present with a ribbon, the next steps are for you!
9. Step 7: Wrap the length of the ribbon around the gift
Before you start wrapping, measure the length of the ribbon by wrapping it around the gift once, then leaving enough extra length for tying a bow.
Once you’ve got the right length, cut the ribbon.
Lay it flat under the gift with equal lengths of ribbon on both sides. Pull the ribbon up over the top of the gift, crossing it in the middle. Flip the gift over, bring the ribbon back around to the top, and make sure it’s snug but not too tight.
10. Step 8: Thread ribbon
Next, take the loose ends of the ribbon and carefully thread them through the loops you’ve created by crossing the ribbon on the top of the gift. This step helps keep the ribbon centered and secure, ensuring everything stays in place. Pull gently to adjust the tension as needed.
11. Step 9: Double knot and tie into a bow
After threading, double knot the ends of the ribbon to secure everything tightly. Then, create loops with the ribbon ends and tie them into a bow. Adjust the loops until your bow looks even and sits neatly on top of the gift.
12. Step 10: Trim edges
Finally, trim the ends of the ribbon for a clean, polished look. You can cut the ends straight, at an angle, or even notch them into little “v” shapes for a decorative touch. This final step gives your gift a professional, well-finished appearance!
Congrats! You’re now a gift wrapping pro!
There you have it—everything you need to know about how to wrap a present, from classic boxes to trickier round shapes. Whether it’s a birthday, special occasion or you’re figuring out how to wrap Christmas presents, this guide has you covered with step-by-step instructions, helpful tips and finishing touches to make your gifts look top-tier.
Now it’s time to put your new skills to the test! Don’t worry if it takes a couple of tries—just follow these steps, and before you know it, you’ll be wrapping gifts like a pro. Grab your paper, ribbon and tape, and get ready to wow your friends and family with your beautifully wrapped presents!
