Working out how to plan a birthday party can feel like a bigger job than you expected, especially when your child’s wish list keeps growing. Between choosing a theme, feeding everyone and finding something to keep the kids entertained, there’s plenty to think about. But you don’t need a packed schedule or a huge budget to put together a celebration they’ll love.
Planning a birthday party involves figuring out your budget, choosing a theme, booking a venue, sending custom invitations three to four weeks prior and organizing food, entertainment and personalized favors to create a memorable celebration. The trick is spreading those jobs out so you’re not tackling everything at once. This guide walks you through what to do and when, with ideas for every age.
- Start planning six to eight weeks ahead to allow time for bookings, invitations and custom decorations.
- Choose activities and a party length that suit your child’s interests and age.
- Repeat a few colors and design details across invitations, banners and favor bags to bring everything together.

How to choose an age-appropriate party theme
Start with what your child enjoys, whether that’s dinosaurs, painting or kicking a ball around with friends. Then think about how they handle busy spaces, group activities and changes to their routine. A theme should help you choose what to do, without turning the day into something your child finds tiring or overwhelming.
1st birthdays and toddlers (ages 1–3)
For a first birthday, familiar faces and space to play may be all your little one needs. Aim for around 60 to 90 minutes, choosing a morning slot if it fits their usual nap schedule. Favorite animals, nursery rhymes or a simple rainbow theme give you plenty of ways to decorate without planning lots of games.
Set up a supervised soft-play area, bring out board books or sing a few familiar songs together. Leave somewhere quieter for children who need a break, with seating nearby for parents and caregivers. Keep decorations out of reach of little hands and choose toys that are suitable for the youngest guests. A milestone poster featuring first-year photos, their favorite things and little achievements makes a lovely welcome display. Afterward, you can keep it as a reminder of the day.
Young kids (ages 4–8)
At this age, a theme can become part of the fun. Turn a pirate party into a treasure hunt, set up a superhero obstacle course or let budding artists decorate something to take home. Offer your child two or three ideas you’re happy to organize so they can help choose.
Around two hours is a useful starting point, with time for arrivals, one main activity, food and cake. Keep instructions short and have a quieter option ready for anyone who doesn’t want to join a noisy game. You can always skip an activity if everyone’s happily playing. For a treasure hunt, younger guests could follow picture clues while older children solve simple riddles. A shared treasure chest at the end means everyone gets to celebrate together.
Tweens (ages 9–12)
Give tweens more say in the guest list, music and activities, then agree on the budget and boundaries together. A gaming tournament, outdoor movie night or craft afternoon can work well with a smaller group. Ask what feels fun to them before ordering decorations, as their favorite theme may have changed since last year.
A make-your-own mocktail station can be as simple as juice, sparkling water and fruit garnishes. For a movie night, check the sunset time and test the screen and sound beforehand. And agree on a finish time that gives everyone enough time to enjoy the main activity. If your child prefers a less themed look, use their favorite colors across the invitations and signs. Stay nearby to supervise while still giving them space to spend time with friends.

Setting a realistic kids’ birthday party budget
Before booking anything, decide what you’re comfortable spending overall. For a smaller celebration at home or a low-cost venue, $200 to $500 can be a starting budget to test against local prices, rather than an amount you need to spend. Your guest count, food choices and paid activities will make a big difference.
Ask your child which part they’re most excited about, then put more of the budget toward that. If it’s a craft activity, you might spend less on decorations and let their finished creations double as favors. Remember to account for invitations, postage, delivery charges and tax before committing the full amount.
Here’s one way to divide a $400 party budget:
| Expense | Example allocation | Amount |
|---|---|---|
| Venue and rentals | 25% | $100 |
| Food, drinks and cake | 35% | $140 |
| Invitations, custom decor and signage | 15% | $60 |
| Entertainment and activities | 15% | $60 |
| Favors and keepsakes | 10% | $40 |
| Total | 100% | $400 |
Hosting at home could free up the venue allowance, while a park may still charge for a pavilion or reservation. A private venue might include food, activities or cleanup, so check what’s covered before comparing prices. Adjust the categories to suit your plans and leave some money unspent until the final headcount is confirmed.

Make a few decorations work together
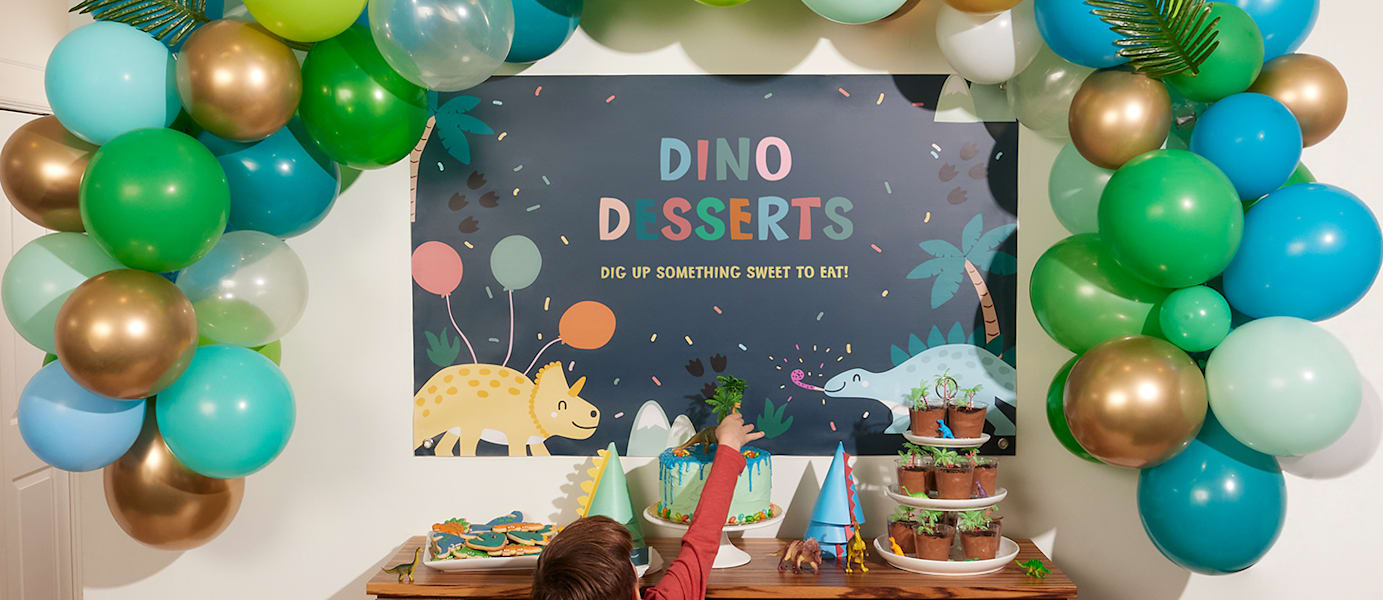
You don’t need to decorate every corner to make the space feel special. Focus on the cake table or main activity area, then repeat the invitations’ colors, lettering and illustration on a banner, welcome sign and favor labels. Carry those details through to thank-you notes afterward.
For easy birthday party banner ideas, try your child’s name and age alongside their favorite animal, a space scene or a colorful pattern. Keep smaller signs simple, with messages like “Decorate your own crown” or “Take a treat for the trip home.” Matching details help even a few decorations feel like part of the same celebration.
Pick two to three main colors and repeat them across your banner, table coverings and favor tags. Plain plates and napkins in those colors can help everything work together without needing a themed version of every item
Managing the guest list and invitations
Start with the number of people your space and budget can comfortably accommodate. For younger children, “age plus one” can be a starting point for the number of child guests, but it’s an optional guideline, not a rule. Count accompanying adults and any invited siblings too, especially when you’re working out food and seating.
If you’re inviting a small group from school, send invitations privately and check the school’s policy on handing them out in class. Make it clear whether parents should stay, whether siblings are included and what guests should bring. Include a way for parents to share dietary requirements or anything that would help their child feel comfortable.

Design, order and send your invitations
Custom party invitations give guests their first glimpse of the theme. Choose personalized invitations in a design you can carry through to the decorations, with cardstock options such as matte or glossy paper. A 5 × 7-inch flat card leaves room for the essentials, while folded styles offer extra space where available.
Include your child’s name, the date, start and end times, address and your contact details. Aim to mail invitations three to four weeks before the party, with an RSVP deadline 10 days before, or earlier if your venue needs numbers sooner. Ask someone else to check the details before you order.
Allow time for printing and delivery
Plan to order invitations around six weeks before the party, so you have time to receive, check and mail them. VistaPrint’s Economy delivery delivers as soon as eight business days, and Standard as soon as six business days, including production and shipping. Availability varies by product and destination, so use the arrival date shown at checkout for your order.
For banners and party signs, aim to order four to five weeks ahead and have them in hand at least a week before the celebration. That’s a planning buffer, rather than a fixed production time, and it gives you room to check sizes and organize hanging supplies. Invitations need an extra step because delivery to your home doesn’t include mailing them on to guests.

The ultimate 8-week birthday party planning checklist
An eight-week birthday party planning timeline gives you room to spread out bookings, purchases and preparation. Use these milestones as a guide, moving reservations earlier if a popular venue or entertainer is known to book up quickly.
Weeks 8–6: Budget, theme and venue selection
Choose the date and party length, set your spending limit and agree on a theme with your child. Draft the guest list before reserving a space so you know how many children and adults to accommodate and book any must-have entertainment now, rather than waiting until invitations go out.
Check access times, bathrooms, seating and what the venue provides, along with any rules about food or decorations. For an outdoor party, decide what you’ll do if it rains. Gather mailing addresses and order invitations around week six.
If you’re juggling several suppliers, the booking and scheduling advice in our guide to how to plan an event can help you keep track.
Weeks 5–4: Invitations and decor orders
Check your invitations when they arrive, then address and mail them three to four weeks before the party. Save your design choices so you can reuse the same colors and illustrations on other items. Our announcement ideas for any occasion offer more inspiration for photo-led designs.
Measure the space before ordering vinyl banners and choose material suited to where you’ll hang them. VistaPrint has 13 oz. indoor vinyl and weather-resistant 15 oz. outdoor vinyl, with grommets available as an optional addition for hanging. Check those options when ordering, along with the delivery date. Order welcome signs, activity signs and favor stickers now, too, so they’re ready before assembly week.
Weeks 3–2: Activity prep and favor assembly
Finalize the menu, confirm your cake order and buy nonperishable food, paper goods and activity supplies. For a custom cake, check the bakery’s lead time and order earlier if necessary. Test any game or craft that needs preparation, checking that you have enough materials for everyone. Keep a simple backup activity ready in case the weather changes.
For easy personalized favors, choose one useful or enjoyable item, for example, an age-appropriate book or a craft the children can make at the party. Place it in a plain paper bag, fold the top neatly and seal it with a custom sticker featuring your child’s name and a thank-you message. Sheet stickers are convenient for assembling several bags, while individual die-cut stickers can become part of the favor itself.
Choose matte or glossy options where possible, and use the matching invitation colors. Arrange the finished bags together near the exit, with a small sign inviting guests to take one.
Week 1 to party day: Final checks and setup
Once the RSVP deadline passes, follow up with guests who haven’t replied and confirm numbers with your venue or food supplier. Finish the favor bags, check deliveries and ask a friend or family member to help with a specific job if needed. Our broader party planning checklist can help you catch any remaining tasks.
Pack decorations by area and add a setup kit with tape, scissors, wipes, markers and suitable hanging supplies. Charge your phone and speakers, then write a loose running order covering arrival times, activities, food, cake and pickup times. Allow one to two hours for setup where the venue allows it.
After the party, note who gave each gift and help your child send thank-you notes. Reusing the invitation design is an easy way to finish the celebration with the same personal touch.
Downloadable checklist

Keep the countdown handy with our printable kids birthday party checklist, covering your budget, venue booking, invitation deadlines and decor setup.
Weeks 8–6: Budget, theme and venue selection
- Settle overall budget and expense allocations.
- Confirm the party theme and color palette with your child.
- Reserve the venue, park pavilion or indoor facility, and book any party entertainers, activity instructors or rental equipment.
- Draft the guest list, gather mailing addresses, and finalize the invitation design.
- Order personalized invitations around week 6.
Weeks 5–4: Invitations and focal decor orders
- Check printed invitations for errors and prepare them for mailing.
- Order custom vinyl banners using weather-resistant 13oz PVC vinyl with metal grommets for easy hanging indoors or outdoors.
- Mail invitations 3 to 4 weeks before the party date.
- Confirm bookings and details with entertainers, instructors or rental providers.
Weeks 3–2: Activity prep and favor assembly
- Finalize party menu, cake order and non-perishable grocery purchases.
- Purchase activity craft supplies, game props and paper goods.
- Assemble party favor bags or treat boxes, sealing them with custom stickers in die-cut single or sheet formats with matte or glossy finishes.
- Track incoming RSVPs and note which guests have yet to respond.
Week 1 to party day: Final checks and setup
- Confirm final headcount with venue and caterers.
- Assemble a day-of emergency kit including tape, scissors, wipes, markers and extra batteries.
- Charge cameras, phones and bluetooth speakers.
- Complete venue setup 1 to 2 hours before guest arrival.
Bring it all together for their big day
With the main details taken care of, you can spend more of the day enjoying the party with your child. A few activities they love, their favorite people and personal touches that make them smile can be more than enough to make it special. And if the games run late or everyone wants a second slice of cake, there’s room to go with the flow – you’ve already done the planning.
Kids’ birthday party ideas FAQ
How far in advance should you plan a birthday party?
Start planning 6 to 8 weeks ahead so you have time to arrange the venue, entertainment and invitations. Start earlier if you need a popular weekend booking or a date near a holiday.
What is a realistic budget for a kids’ birthday party?
A $200 to $500 budget can be a starting point for a smaller celebration, depending on local prices and how many people you invite. Decide what you can comfortably spend, then check venue, food and activity costs before booking.
How long does it take to print custom party invitations?
Timing depends on the invitation, quantity, destination and delivery option, and VistaPrint’s displayed delivery estimates include production. Check your order’s arrival date and allow extra time to address and mail the cards once they arrive.
When should kids’ birthday party invitations be sent?
Mail invitations three to four weeks before the party. Set an RSVP deadline around 10 days beforehand, bringing it forward if your venue needs an earlier final count.
How do I choose an age-appropriate theme for a toddler’s birthday party?
Choose something familiar that your child enjoys, for example, animals, a favorite story or music. Keep the celebration short, plan the times around their nap schedule and plan simple activities with space for quiet breaks.
How do I make DIY party favor bags look professional?
Use matching plain bags and seal each one with a personalized sticker in your party colors. Keep the message short and arrange the bags together so they become part of the display.

