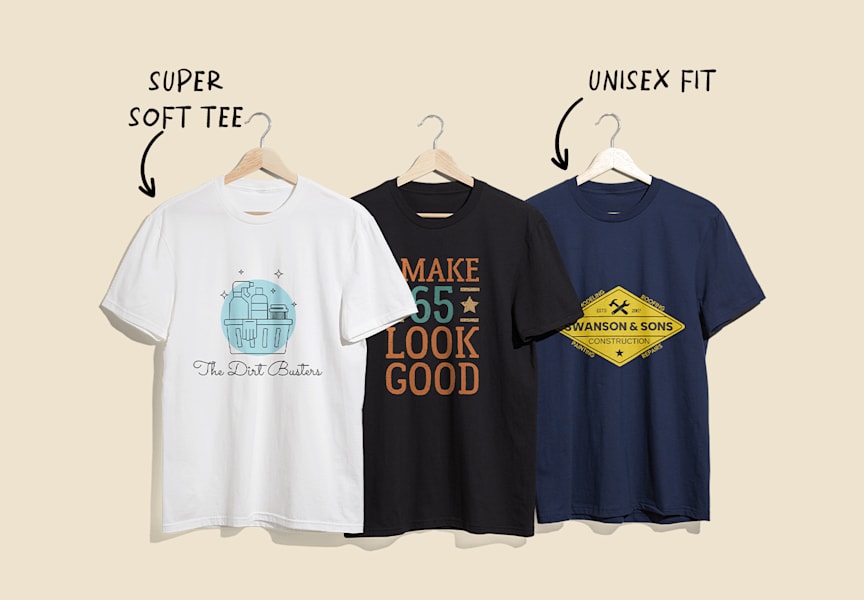
Whether you’re creating uniforms for your team, ordering event merchandise, launching your own clothing line or promoting your business locally, custom T-shirts are a powerful way to get your brand seen. But for many small business owners and independent creators, the T-shirt printing process can feel confusing at first, especially when you’re trying to turn a digital design into a finished product people will want to wear.
This guide breaks down the main things you need to know before placing an order. We’ll look at how to choose the right printing method, when bulk T-shirt printing makes sense, how different printing options work and how to prepare production-ready files that help your final design come out as expected.
- Choosing the right printing method depends on a few practical details: how many items you need, how detailed your design is, what fabric you’re printing on and how much you want to spend.
- Direct-to-film (DTF) printing is now a popular option for custom clothing because it can produce full-color designs and works well on a wide range of fabrics compared to direct-to-garment (DTG).
- Before sending your design to print, check that the artwork is high quality, the fonts are outlined or embedded and the colors are set up correctly. This helps avoid unexpected changes during production.
- Extra print placements, such as sleeve designs or inside-neck prints, usually need additional setup. This can increase the cost per item, especially on smaller orders.
Step 1: Create your T-shirt design
Start by thinking about what you want your T-shirt design to do. Is it there to make your team look more professional, promote your business, sell as part of a product range or give people something memorable to take away from an event? A good design should feel true to your brand, while also being clear enough to print well on fabric.
Then, it’s worth checking the basics: will the text still be easy to read from a distance? Do the colors stand out against the T-shirt? Are the lines, shapes or logo details too small to print clearly? Thinking about these details early can help you avoid a final design that looks crowded, faded or hard to understand.
You’ll also need to decide whether a simple text-based design or a more detailed graphic is the better fit. Text-only designs can work well for uniforms, staff T-shirts and clean branded merchandise. Full-color graphics, illustrations or detailed logos can be a stronger choice for event merchandise, limited-edition products or designs where you want a bolder look.
Before you finalize your design, make sure there is enough contrast between the artwork and the T-shirt color. Dark designs are hard to see on dark fabrics, and very small text or thin lines may not print as clearly as they look on screen.
Need help choosing the right style? Explore our dedicated guide to how to design T-shirts.
Step 2: Know your quantity and budget
Before you place an order, think about how many T-shirts you need and how much you want to spend. Quantity matters because some T-shirt printing methods are better suited to small batches, while others become more cost-effective when you order more.
For example, traditional methods such as screen printing often involve setup costs before production begins. These costs can make smaller orders more expensive per item, but the price per T-shirt usually becomes better value as the order size increases. This is why screen printing can work well for bulk T-shirt printing, especially if your design is simple and uses a limited number of colors.
Digital methods, such as DTF printing, usually need less setup. That can make them a good choice for smaller orders, detailed designs or one-off products. They also give you more flexibility if you want to test a design before committing to a larger print run.

How print placement affects cost
The number of print placements can also affect your final price. A design on the front of the T-shirt will usually cost less than a T-shirt with a front print, sleeve print and back neck logo, because each extra placement adds more production time.
If you’re working with a tight budget, focus on one strong, visible print area, such as the center chest or back. This keeps the design clear, helps control costs and can make the ordering process simpler. Once you know a design works, you can always add extra placements in a future order.
Step 3: Choose a printing method
Once you know your design, quantity and budget, the next step is choosing the right T-shirt printing method. The best option depends on what your design looks like, how many T-shirts you need, what fabric you’re printing on and the finish you want.
Some methods are better for simple designs and bulk T-shirt printing, while others are better for detailed artwork, small batches or mixed fabric types. Here are the main options to know before you order.
Screen printing
Screen printing is a popular choice for larger T-shirt orders, especially when the design is bold, simple and uses a small number of colors. It works by pushing ink through a stencil onto the fabric, with a separate screen usually needed for each color in the design.
Because there is more setup involved, screen printing is often better value for bulk T-shirt printing than for very small orders. Once everything is set up, it can produce strong, long-lasting prints with bright colors.

Direct-to-garment (DTG) printing
Direct-to-garment printing, often called DTG, prints your design directly onto the T-shirt using specialist inkjet technology. It’s a good option for detailed, full-color designs, including artwork with gradients, shading or photographic details.
DTG usually works best on cotton T-shirts and is often suited to smaller orders because it does not need the same screen setup as traditional screen printing. This can make it useful for testing a design, creating limited runs or printing designs with lots of colors.
Direct-to-film (DTF) printing
Direct-to-film printing, often called DTF, is another digital T-shirt printing method. Your design is printed onto a special film, then transferred onto the fabric using heat.
DTF has become popular because it works on a wider range of fabrics than some other digital methods. It can handle detailed, full-color designs and is a flexible choice for small businesses that want to print across different T-shirt styles, fabrics or order sizes.
Vinyl graphics
Vinyl printing uses cut-out shapes or letters that are heat-pressed onto the T-shirt. It works best for simple designs, bold lettering, numbers, names and high-contrast graphics. This method can create a clean, crisp finish with a slightly raised feel. However, it is usually less suitable for very detailed artwork, soft gradients or designs with lots of colors.
Embroidery
Embroidery uses thread instead of ink, creating a stitched design on the garment. It is often used for logos, uniforms, workwear and premium branded clothing. Because embroidery has texture and depth, it can give T-shirts, polos, jackets and outerwear a more polished feel. It works best for simpler logos or text, rather than highly detailed artwork or large full-color designs.
T-shirt printing methods comparison table
| Decoration method | Minimum order threshold (MOQ) | Maximum color capacity | Ideal fabric weight | Setup cost variables |
|---|---|---|---|---|
| Screen printing | 50 units (typical) | 6-8 spot colors max | Mid-to-heavy cotton & blends (180-240 GSM) | High – billed per individual color screen burned |
| DTG printing | 1 unit (no minimum) | Unlimited (Digital RGB/CMYK) | Lightweight 100% porous cotton (140-160 GSM) | Zero configuration fees – direct digital feed |
| DTF transfers | 1 unit (no minimum) | Unlimited (photographic) | Highly versatile – lightweight to heavy synthetics/blends | Extremely low – sheet layout transfer processing |
| Vinyl graphics | 1 unit (no minimum) | 1-2 solid colors max | Midweight performance polyesters (160-180 GSM) | Billed per custom sheet |
| Embroidery | 6 units (typical) | 12-15 thread shades | Heavyweight premium pique & wovens (200+ GSM) | Scaled directly by final total stitch digitizing count |
Step 4: Choose a fabric, color and T-shirt type
The fabric you choose can affect how your design looks, feels and lasts. Some fabrics absorb ink easily, while others need a different T-shirt printing method to help the design sit properly on the surface.
As a simple rule, cotton is usually a good match for direct-to-garment printing (DTG) , while polyester and blended fabrics often work well with direct-to-film printing (DTF). Natural, porous 100% cotton fibers natively bond with water-based DTG and screen inks for a seamless soft-hand touch, whereas synthetic 100% polyester repels water bases, requiring specialized chemical pre-treatments or heat-fused plastisol transfers to prevent decoration failure. Your T-shirt color matters too. Dark shirts may need an extra base layer under the design so the colors stay bright and easy to see.
100% cotton
Cotton is soft, breathable and absorbent, which makes it a popular choice for custom T-shirts. It works especially well for DTG printing because the ink can settle into the fabric and create a smooth, comfortable finish. Cotton is a strong option for retail merchandise, team shirts, event T-shirts and everyday branded clothing.
100% polyester
Polyester is durable, lightweight and often used for sportswear, uniforms and performance clothing. Because it does not absorb water-based inks in the same way as cotton, it usually needs a printing method that bonds well to synthetic fabric. DTF printing can be a good option for polyester because the design is transferred onto the surface using heat.
Poly-cotton blends
Poly-cotton blends combine the softness of cotton with the durability and wrinkle resistance of polyester. They can be a practical choice for staff T-shirts, casual uniforms and merchandise that needs to be comfortable but hard-wearing. Prints on blended fabrics can sometimes look slightly softer or more vintage than prints on pure cotton, depending on the fabric mix and printing method.
Different fabrics work better with different printing methods. Understanding these differences can help you create T-shirts that look great and hold up over time. Here’s a handy reference:

Step 5: Place your design on the T-shirt / Choose your print placement
Where you place your design affects how the finished T-shirt looks and how easy your message is to read. A large logo across the center chest has a bold, promotional feel, while a smaller left chest logo can look more polished and professional.
It’s also worth thinking about how the T-shirt will be worn. A front design should stay visible when someone is standing, moving or wearing an open jacket. A back design gives you more room for larger artwork, event details or sponsor names, while a sleeve print can add a small branded detail without making the shirt feel too busy.
Generally, left chest designs sit 3-4 inches below the collar seam, while center chest designs sit 2 to 3 inches below the collar and stay centered on the T-shirt. Measurements can vary depending on the T-shirt size, fit and print area, so always check the placement preview before placing your order.
Center chest
Center chest placement is a good choice for bold logos, campaign designs, event T-shirts and promotional graphics. It gives your design a clear, central position and helps people understand the message quickly. The best size for center chest designs is 10 to 12 inches.

Left chest
Left chest placement works well for uniforms, staff T-shirts and more subtle branding. It’s usually best for compact logos, short text or simple brand marks that need to look clean and professional. They’re usually placed 3 to 4 inches under the collar seam, inline with the center of the armpit seam. Ideally, a left chest design should have a 3.5 to 4-inch clear buffer around it.
Back panel
A back print is useful when you need more space than the front of the T-shirt allows. It can work well for event T-shirts, volunteer shirts, sponsor lists, tour-style designs or larger graphics. The design can stretch across the shoulder blades and take up the full length or just part of the space on the back of the tee.
Sleeve
Sleeve prints are best used as an extra branding detail, rather than the main design. A small logo, date, tagline or event name can add a more finished feel to the T-shirt without distracting from the main artwork. They are often printed along the sleeve or across the sleeve hem line.
Get inspired with our hoodie design ideas curated to help you think creatively about your shirt design.
Step 6: Prepare your artwork files
Before you upload your design, take a few minutes to check that your artwork is ready for printing. Clear, high-quality files give the printer the best chance of producing a sharp, accurate design on your T-shirt.
To prepare production-ready files, check that your file type, image quality, background and text are set up correctly before you send your design to print.
Artwork setup checklist
Choose the right file type
For logos, text-based designs or illustrations, vector files are usually best because they can be resized without becoming blurry. Common vector file types include AI, EPS and print-ready PDF files.
For photographic or full-color artwork a high-quality PNG file can work well, especially if the design needs a transparent background.
Know the difference between vector and raster files
| Vector files: AI, EPS, print-ready PDF | Raster files: high-res PNG or JPG | |
|---|---|---|
| How they work | Built from lines, shapes and paths | Built from pixels |
| What happens when you resize them | Can usually be resized without losing sharpness | Can become blurry or pixelated if enlarged too much |
| Best for | Logos, text-based designs, simple illustrations and clean brand graphics | Photos, detailed artwork, full-color designs and smooth gradients |
| What to check before uploading | Make sure fonts are outlined or embedded and the file is saved in the recommended format | Make sure the image is high resolution, ideally 300 DPI at the final print size |
Check the image resolution
If your design uses a photo or other raster image, make sure it is high resolution. As a general guide, artwork should be 300 DPI at the final print size.
Avoid using small images pulled from websites or social media, as these are often too low resolution for T-shirt printing. They may look fine on screen, but can print blurry or pixelated when enlarged.
Use a transparent background
If your logo or artwork does not need a background, save it with a transparent background. This helps prevent a white box or unwanted background shape from appearing around your design. Before uploading, open the file and check the edges of your artwork carefully to make sure only the design itself will be printed.
Print color accuracy and Pantone matching
The colors in your printed T-shirt may not look exactly the same as they do on your screen. This is because screens and printed fabric create color in different ways. Choosing the right color codes helps ensure your printed shirt matches your design.
RGB is used for digital screens and can display bright, vibrant colors that may not be reproducible in print, so RGB files often shift when printed.
CMYK is the standard color model for most full-color printing methods, including DTG and DTF printing, making it a better choice for print-ready artwork.
Pantone (PMS) uses standardized spot colors that allow printers to match specific brand colors precisely, making it popular for screen printing projects where color consistency is critical. This is especially important for branded uniforms, retail merchandise or bulk T-shirt printing.
Before submitting artwork, check your printer’s requirements, but in general, convert designs to CMYK for full-color printing and specify Pantone colors when exact brand color matching is needed.
Check your fonts before exporting
Fonts can sometimes change when a design file is opened on another computer or uploaded to a printing system. If the printer does not have the same font file, your text may be replaced with a different font, which can affect the spacing, layout and overall look of your design.
To avoid this, outline or embed your fonts before exporting your production-ready files. Outlining turns the text into fixed shapes, so it keeps the same appearance even if the original font is not available.
If you’re using Adobe Illustrator, you can usually do this by selecting your text and choosing Type > Create Outlines. Before you outline anything, save an editable copy of your design as well. Once text has been outlined, it is much harder to edit later.
Step 7: Check your proof and print
Before you approve your order, take time to review the proof carefully. This is your chance to catch small mistakes before your T-shirts go into production.
Be sure to confirm:
- spelling
- logo placement
- text alignment
- colors
- overall layout
It can also help to ask someone else to look at the proof, especially for bulk T-shirt printing orders, as a fresh pair of eyes may spot something you’ve missed.
If you’re ordering a large run, consider ordering a sample first where possible. This can help you check how the design looks on the fabric, how the colors appear in real life and whether the print size feels right when the T-shirt is worn.
How to care for printed T-shirts and make designs last
Once your T-shirts have been printed, the right care can help the design stay clear, bright and wearable for longer. Always follow the care label first, as instructions can vary by fabric and printing method.
- Turn T-shirts inside out before washing: Washing printed T-shirts inside out helps protect the design from rubbing against the washing machine drum, zippers or other rough items in the load.
- Use cold water: Cold wash cycles are usually gentler on printed T-shirts. As a general guide, wash at 30°C/86°F or below to help protect the fabric and print.
- Choose mild detergent: Harsher cleaning products have greater risk of damaging the print.
- Avoid high heat: High heat can affect some printed designs, especially vinyl or transfer prints. Air drying is often the safest option, but you can also tumble dry on low if the care label allows it.
- Do not iron directly over the print: If the T-shirt needs ironing, turn it inside out or iron around the printed area. Direct heat can damage the design.
2026 T-shirt design and printing trends
If you’re looking for inspiration, today’s biggest graphic design and color trends can help your T-shirt designs feel fresh without sacrificing wearability. According to VistaPrint’s latest trend forecasts, people are gravitating toward designs that feel more human, expressive and authentic rather than overly polished.
Here are a few trends that translate especially well to custom apparel:
- Elemental Folk embraces handcrafted motifs, nature-inspired illustrations and heritage patterns. These designs pair naturally with heavyweight cotton tees, garment-dyed shirts and earthy colorways such as olive, clay, sand and cream. Screen printing can help reinforce the trend’s handcrafted aesthetic with bold, durable graphics.
- Tactile Craft celebrates visible brushstrokes, textured graphics and hand-drawn artwork. Because these designs often contain subtle details and color variation, DTG printing is a great choice for reproducing their organic look and feel. Premium cotton garments also help showcase intricate artwork more clearly than heavily textured fabrics.
- Hyper-Individualism encourages bold self-expression through custom illustrations, unexpected typography and distinctive visual identities. This trend works well with print-on-demand production because it allows businesses, creators and event organizers to offer multiple design variations without ordering large quantities of each style.
- Neon-Noir and Hyper-Bloom feature high-contrast colors, luminous gradients and dramatic visual effects. These trends are best suited to print methods that can reproduce vibrant, full-color artwork. Pairing bright designs with black or dark-colored shirts can maximize visual impact, while high-resolution artwork helps preserve color transitions and fine details.
- Color trends are also influencing garment selection. Earthy neutrals, soft pastels and nature-inspired tones can serve as the shirt color itself, reducing the need for heavy ink coverage while creating a more premium, fashion-forward look. Choosing the right shirt color can be just as important as choosing the colors in your design.
You don’t have to build an entire T-shirt around one trend. The most effective designs consider the entire product – from the artwork and color palette to the garment and print method – to create apparel that looks great both online and in person.
Looking for a different vibe? Explore more of this year’s color trends and design trends for more inspiration.
Now you’re ready to start T-shirt printing
T-shirt printing is becoming more flexible, with more options for small batches, on-demand orders and detailed full-color designs. For small businesses, this makes it easier to test ideas, create limited runs or order branded clothing without committing to a large quantity straight away.
And before you design, think about how your printed T-shirts connect with the rest of your marketing. For example, a QR code on a swing tag, label or packaging insert could send customers to your website, product story, event page or social media profile. Consider promoting your clothing launch with custom stickers, postcards or packaging that uses the same design style.
T-shirt printing FAQs
What is the cheapest way to print custom T-shirts?
For bulk T-shirt printing, traditional screen printing is often the most cost-effective method. While the upfront setup fees are higher, the per-unit cost drops as your order quantity increases, which can make it a good-value option for small businesses ordering in volume.
At lower volumes, DTG or DTF methods become more cost effective.
Is direct-to-garment (DTG) or screen printing better?
The best method depends on your design and the size of your print run. Screen printing is best for large batches with clean, simple designs and fewer colors. Direct-to-garment printing is better for small batches or one-off orders that feature complex, detailed artwork or high-resolution photography.
Can you print custom clothing with no minimum order quantities?
Yes. Modern digital methods like direct-to-garment (DTG) and direct-to-film (DTF) transfer printing read your design directly from a computer file. So, depending on your printer’s policies, you may be able to order single items or test small batches with no minimum order quantity, depending on the product and provider.
Why do my printed T-shirt colors look different than my digital design screen?
Digital monitors display artwork in RGB whereas printed T-shirts use inks on fabric. Because screen colors often look brighter than printed colors, you should check the recommended color settings before exporting your production-ready files. Most printers work with files with CMYK color codes and/or Pantone colors.
How do I make my custom printed T-shirts last longer without cracking?
To protect your prints from wear and cracking, wash your garments inside out in cold water on a gentle cycle, and use mild detergents. Avoid high-heat dryers; instead, air-dry or line-dry your custom shirts where possible, and always follow the care label.

