What do a fishing net and a banner have in common? Surprisingly, more than you might expect! While a physical banner can’t catch fish, it can definitely catch the attention of the rivers of people passing by, giving your business a bigger haul of potential customers.
You already know the potential here: Banners can deliver billboard-level advertising power at a fraction of the cost. Even better, they’re easier to make than you might think. In this article, we’ll walk you through everything you need to know about how to make a banner, from choosing materials and crafting a design that stands out to hanging it up for maximum visibility. Let’s dive in!
- A banner is simply a large printed flag designed to grab attention and draw people toward your product, event or business.
- Banners are a cost-effective way to boost visibility and reach your target audience, especially when placed in high-traffic spots.
- Whether you opt for vinyl, mesh, pole, retractable or pennant banners, there’s a wide range of sizes and shapes to fit any location or purpose.
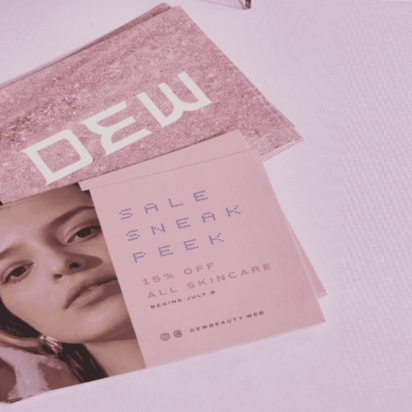
- To make your banner shine, be sure to include the essentials, like your business name, a headline, a call to action and contact details, while keeping the design clean and uncluttered.
- When designing a banner for print, consider the location, use high-resolution graphics, pick easy-to-read fonts, account for grommets and remember to leave a safe area so none of your design gets cut off.
What is a banner?

A physical banner (not to be confused with the digital banners that you see online) is a large piece of printed material, typically made of vinyl, fabric or polyester mesh, that conveys a message or promotes something. What does a banner look like? They come in different shapes and sizes. But regardless of what they look like, all banners have the primary goal of drawing attention. They’re a versatile type of advertising idea because they can be placed both indoors and outdoors, wherever your ideal customers may be passing by.
Why use a banner?
Before we dive into the dos and don’ts of custom banner design, let’s talk a little bit more about why banners are so important for businesses. Whether or not you should use a banner depends on what you want to achieve and who you want to advertise to.
Just like picking the perfect spot to catch your ideal fish, if you know that your target audience often passes by a certain location, then a banner is a great way to grab attention and get more customers coming through your door.
Banners come with a variety of unique benefits, including:
- Visibility: Well-designed banners are nearly impossible to ignore. Placed strategically, they can be seen from a distance, making them excellent for attracting foot traffic to your business or event.
- Cost-effectiveness: Compared to other forms of advertising, like TV commercials or billboards, banners are relatively inexpensive to produce and can be reused for many occasions.
- Customization: You have complete control over the design, message and placement of your banner. This allows you to tailor your message to your ideal customer and make it your own.
- Durability: If you print high-quality banners onto durable materials like vinyl, they can last for years, making them a long-term investment.
- Versatility: Banners can be used for a variety of purposes, from announcing a grand opening to promoting a special offer or welcoming attendees to an event.
How to make a business banner in 5 steps
Now that you know what to consider when designing a banner, let’s break down the actual steps to create one:
1. Define your purpose, audience and location
Before you start designing, it’s important to have a clear understanding of what you want to achieve with your custom banner, who your target audience is and where the banner will be seen. This will guide your design and material choices.
2. Choose your banner type and material
Once you’ve defined your purpose, audience and location, you’ll find it easier to choose the right shape, size and material for your banner.
Choose a shape and size that will help you grab the attention of your target audience and share your message. Also, select a material that’s suited to the environment where your banner will be displayed.
3. Design your banner
There are a few ways you can design your custom banner:
Option 1: Design from scratch with VistaCreate
If you want to design your banner from scratch, you can use VistaCreate to do so quickly and easily.

On the homepage, under the “For You” tab, you’ll see a custom size option. Click on it and enter the dimensions you want for your banner.

Then click on “Create Design” to get to work.

In VistaCreate’s design workspace, you have access to a library of photos and graphic elements. If you don’t have a designer’s eye, don’t worry—you have ready-made matching color palettes and font combinations that you can use right away.
If you have your own brand colors, you can create your own brand kit to quickly make a design align with your branding.
Once you create your banner design, you can export it as a JPG or PNG. Then upload it to VistaPrint by searching for the type of banner you want in the search bar, going to its product page and clicking “Upload design.”

Option 2: Use a VistaPrint banner template
If designing from scratch doesn’t tickle your fancy, you can also choose a banner template on VistaPrint that matches the size and type of banner you’re after.
To do so, instead of uploading your design through the banner’s product page, click on “Browse designs.” You’ll see that there are thousands of templates to choose from.

You can filter the templates by industry, occasion, styles, size, orientation and more—so it’s easy to find a template that matches what you need.
Once you’ve found your perfect template, click on it and hit “Edit my design.”

You’ll then be brought to the VistaPrint Studio, where you can edit the template.
Add your own text, upload images like your brand logo or easily put in a QR code to link to your website.
All the banner templates on VistaPrint have a bleed area for the seams and grommets, so you don’t have to worry about your design getting cut off when editing.

Option 3: Team up with a VistaPrint designer
If you want to save yourself some time and have a banner made from scratch, you can work with a VistaPrint designer through VistaPrint Design Services to take care of all the hard work for you.
Simply fill out a short brief, grab a coffee and put your feet up—you’ll have your design in no time.

4. Check the design proof
Whether you’ve created your design on VistaCreate and uploaded it to VistaPrint, or you’ve edited a VistaPrint template directly, once you’re finished it’s a good idea to take a look at the design proof.
The design proof gives you a sneak peek of what your design will look like once printed. You can download and print a design proof to spot any errors and make sure everything’s looking good.
To get a design proof while working in VistaCreate, click on the “Preview” button and then on “Download PDF proof.”
5. Print your banner
Once you’re happy with the banner, click on “Next,” where you’ll be taken to the design review page. This gives you the chance to review your design one last time before printing (saving you a few headaches).
Tick the box “I’ve reviewed and approve my design” when you’re ready, and then click “Continue.”

Your banner will be added to your cart and then printed. You’ll soon have your creation arriving at your door, ready to hook in your ideal customers.
Common banner sizes and shapes
Since banners come in a variety of sizes and shapes, it can be tricky to know which is best for your business.
It’s a good thing you’re reading this post, though, because below, you’ll find a list of the different types of banners, their common sizes and what they’re perfect for:
Vinyl banners

Vinyl banners are especially versatile and durable. They’re suitable for indoor use and can withstand the elements outdoors. They’re also weather- and fade-resistant and can last outside for up to two years.
Common sizes include:
1′ x 2′ (30 x 61 cm)
1.7′ x 3′ (52 x 91 cm)
2.5′ x 4′ (76 x 122 cm)
2.5′ x 6′ (76 x 183 cm)
2.5′ x 8′ (76 x 244 cm)
2.5′ x 10′ (76 x 305 cm)
2.5′ x 12′ (76 x 366 cm)
4′ x 4′ (122 x 122 cm)
4′ x 6′ (122 x 183 cm)
4′ x 8′ (122 x 244 cm)
4′ x 10′ (122 x 305 cm)
4′ x 12′ (122 x 366 cm)
6′ x 10′ (183 x 305 cm)
6′ x 12′ (183 x 366 cm)
8′ x 10′ (244 x 305 cm)
8′ x 12′ (244 x 366 cm)
Mesh banners

Mesh banners are also a great option for outdoor advertising. They’re made out of a woven polyester mesh that allows wind to pass through. They’re also water- and UV-resistant, making them more durable.
But since mesh banners have small holes woven in, they can come across as a little transparent and might not pop out as much as vinyl banners.
Common sizes include:
1.7′ x 3′ (52 x 91 cm)
2.5′ x 4′ (76 x 122 cm)
2.5′ x 6′ (76 x 183 cm)
2.5′ x 8′ (76 x 244 cm)
2.5′ x 10′ (76 x 305 cm)
2.5′ x 12′ (76 x 366 cm)
4′ x 4′ (122 x 122 cm)
4′ x 6′ (122 x 183 cm)
4′ x 8′ (122 x 244 cm)
4′ x 10′ (122 x 305)
4′ x 12′ (122 x 366 cm)
6′ x 10′ (183 x 305 cm)
6′ x 12′ (183 x 366 cm)
8′ x 10′ (244 x 305 cm)
8′ x 12′ (244 x 366 cm)
Pole banners
These are the kind of banners you see on streetlights around town. They’re a great way to advertise events and grand openings across a town or city. Made of high-quality PVC vinyl with double-needle lockstitching, they’re tough and weather-resistant.
Common sizes include:
48″ x 24″ (122 x 61 cm)
48″ x 30″ (122 x 76 cm)
60″ x 30″ (152 x 76 cm)
72″ x 30″ (183 x 76 cm)
72″ x 48″ (183 x 122 cm)
96″ x 30″ (244 x 76 cm)
Retractable banners

Common at trade shows and conventions, retractable banners are perfect for indoor events. As their name suggests, they’re quick and easy to set up and put away. Retractable banners are also a handy way to share a QR code that links to your website.
Common sizes include:
24″ x 62″ (61 x 157 cm)
33″ x 81″ (84 x 206 cm)
47″ x 81″ (119 x 206 cm)
Fabric banners
Ideal for indoor use, fabric banners can be used for table displays, restaurants, offices, retail storefront signage and more. They’re made of light, fade-resistant polyester fabric that’s machine washable, crease-free and scratch-resistant.
Common sizes include:
1.7′ x 3′ (52 x 91 cm)
2.5′ x 4′ (76 x 122 cm)
2.5′ x 6′ (76 x 183 cm)
2.5′ x 8′ (76 x 244 cm)
2.5′ x 10′ (76 x 305 cm)
2.5′ x 12′ (76 x 366 cm)
4′ x 4′ (122 x 122 cm)
4′ x 6′ (122 x 183 cm)
4′ x 8′ (122 x 244 cm)
4′ x 10′ (122 x 305 cm)
4′ x 12′ (122 x 366 cm)
6′ x 10′ (183 x 305 cm)
6′ x 12′ (183 x 366 cm)
8′ x 10′ (244 x 305 cm)
8′ x 12′ (244 x 366 cm)
Pennant banners

Reminiscent of medieval banners, pennant banners are a great way to grab attention with a good dose of fun. Use them as decoration for indoor events or for the outdoors—their tough vinyl material means they’re suited to both.
Common sizes include:
2′ x 3′ (61 x 91 cm)
2′ x 4′ (61 x 122 cm)
3′ x 4′ (91 x 122 cm)
4′ x 6′ (122 x 183 cm)
Essential information to include in a banner
Before you dive into the banner design process, it’s important to think about what information you need to include in your banner. Keep in mind that a banner’s main purpose is to convey a message quickly and effectively.
Here are some suggestions that can put you on the right track:
- Business name and logo: By including your business’s name and logo, and making it prominent, you’ll be letting passersby know who you are, increasing brand recognition.
- Headline: Create a clear and concise headline that conveys the purpose of your banner. This can be the trickiest part. Clarity is key here, but if you can also write the headline in a way that grabs attention, too, then you’ve got a winning combination.
- Call to action: After reading your message, the viewer needs to know what to do next. Encourage them to take a specific action, such as “Visit us today” or “Call now.”
- Contact information: Include your phone number, website, social media channels and physical address. Make it easy for potential customers to connect with you.
Try adding a QR code to your banner. You’ll be making it even easier for people to find your website, learn more about you and get in touch.
Remember, less is often more when it comes to what you include in your banner. It’s better to avoid cluttering your banner with a lot of text and graphics. A simple banner will do a better job of grabbing attention and conveying your message quickly.
What to include when designing a banner for print
There are a few things to keep in mind when designing a banner for print. By following the tips below, you’ll be making the process easy and giving yourself the best chance of creating a design that stands out:
Location
The first thing to think about is where you’ll place your banner. Is it indoors? Or outdoors? By considering the location, you’ll find out what type of banner and material would be best suited to the environment.
If you can, it’s a good idea to have a look at the colors present in the location where the banner will hang, as this is often overlooked.
If the location’s colors are similar to the banner’s colors, then your banner might blend in and struggle to bring the attention you deserve. If you find that to be the case, it might be worth thinking about changing your banner’s colors or switching locations.
A good rule of thumb is to use banner colors that contrast with the environment and make it stand out. For example, if your banner is going to hang on a white wall, using darker colors will help draw the eyes of passersby.
Colors
Colors can be a powerful way to capture attention and share a message.
Try using bold, contrasting colors that align with your brand’s visual identity. Consider the psychology of colors, too, and the message you want to convey with them. Red, for example, is associated with excitement, while a cool blue conveys trust.
Graphics
It’s important to use high-resolution images—or better yet, vector images—for your banner. Otherwise, it’ll look pixelated and blurry, making it difficult for people to read it.
If you’re creating your own banner using design software, remember to use the CMYK color model—otherwise, the colors will look different on the printed banner.
Typeface
The purpose of a banner is to convey a message quickly and effectively. High-resolution images and graphics help with this, but so does legible typography.
Sans serif typefaces (such as Helvetica) are great to use because they’re easier to read. A fancy font, as fun as they are to use, can detract from the clarity of your message, sabotaging your advertisement.
You can draw eyes to the most important bits of information on your banner by using contrasting typefaces. Try using one typeface for the headline and a different one for the rest of the banner’s text.
Grommets
When it comes to banner design, it’s essential to account for grommets. Sadly, a grommet isn’t the Aardman animated silent companion to Wallace.
Grommets are rings used to reinforce your banner’s holes so your lovely design doesn’t tear.
When making your banner, make sure to account for the fact that your design will get cut off when it reaches the grommets and the seams. To ensure that doesn’t happen, design your banner with a 1″ (2.5 cm) buffer around it.
The great news, as you’ll soon see, is that VistaPrint’s banner maker templates already come with a safe area, so you don’t have to worry when designing.
Reel in some more business
And there you have it: You now have all the signage design tips and know how to make a banner that will grab attention and reel in some more business 🎣
FAQs about how to make a banner
How do I choose the right material for my banner?
Think about where you’ll hang it: outside in the elements or inside a cozy shop. Materials like vinyl hold up great to wind and rain, while lighter fabrics can look super classy indoors.
Can I include logos or graphics in my banner design?
Absolutely, feel free to get creative and show off your brand’s style. Just make sure your images are high-res so everything pops when printed.
What is the best file format and resolution for banner designs?
Go with vector formats like PDF for crisp lines, or use a high-resolution JPEG/PNG if that’s all you have. Aim for at least 150 dpi for large prints, so your design stays sharp and not grainy.
What finishing options are available for banners?
You can go with grommets, pole pockets or even hemmed edges to keep things neat and easy to hang. If you want extra flair, consider reinforced corners or wind slits for those breezy days.
Where should I hang my banner for the best effect?
Place it where it catches people’s eyes, like above your store window, on a busy fence line or right by a popular entrance. You want maximum visibility so everyone sees your message loud and clear.